How to Screen Topsoil with a Screening Bucket: Setup, Tips, and Screen Sizes
A screening bucket is the simplest way to start screening topsoil on site. You mount it on an excavator or skid steer you already own, scoop up raw dirt, and let the bucket separate clean topsoil from rocks, roots, and debris. No separate machine. No hopper to feed. No conveyors to set up.
We have been selling screening equipment since 1973. We carry trommel screens, shaker screens, and screening attachments at every scale. A screening bucket is where a lot of contractors start, and for the right volume, it is the right tool. This guide covers how to set one up, how to get the most out of it, and when you have outgrown it.
Why Screen Topsoil On Site Instead of Buying It Screened
Screened topsoil sells for $25 to $45 per cubic yard in most markets. If you are buying it by the truckload for every job, those costs add up fast. Screening your own topsoil on site changes the math entirely.
Cost savings are the most obvious reason. Raw, unscreened topsoil costs a fraction of screened product. If you are already excavating or clearing land, you have material sitting in piles that you are paying to haul away. Screen it instead and you have a product you can use on the same job or sell to someone else. The cost to screen topsoil with a bucket attachment, once you own the bucket, comes down to fuel, wear on the mesh, and the operator's time. For most contractors, that works out to $5 to $10 per cubic yard in operating cost. Compare that to $35 per yard delivered from a supplier.
Quality control is the second reason. When you buy screened topsoil, you get whatever the supplier screened that week. Some loads are clean. Some have chunks, roots, and inconsistent particle size. When you screen your own, you control the mesh size and the finished product. If a customer wants fine garden-grade topsoil, you run a tighter mesh. If the job calls for rough fill, you run a coarser screen and move through the pile faster.
Turning waste piles into revenue is the third reason. Every land clearing job, excavation project, and demolition site produces dirt piles that need to go somewhere. Hauling them off costs money. Screening them on site turns a disposal cost into a sellable product. A contractor who screens 20 to 30 cubic yards from a job site waste pile and sells it at $30 per yard has created $600 to $900 in revenue from material that was going to cost money to remove.
Even if you do not sell the screened topsoil, using it on the same job site saves you from buying and trucking in material from somewhere else. That is real money on every project.
Setting Up Your Screening Bucket
Getting a screening bucket attachment running is straightforward, but doing it correctly matters for production and longevity. Here is what the setup involves.
Mounting the Bucket
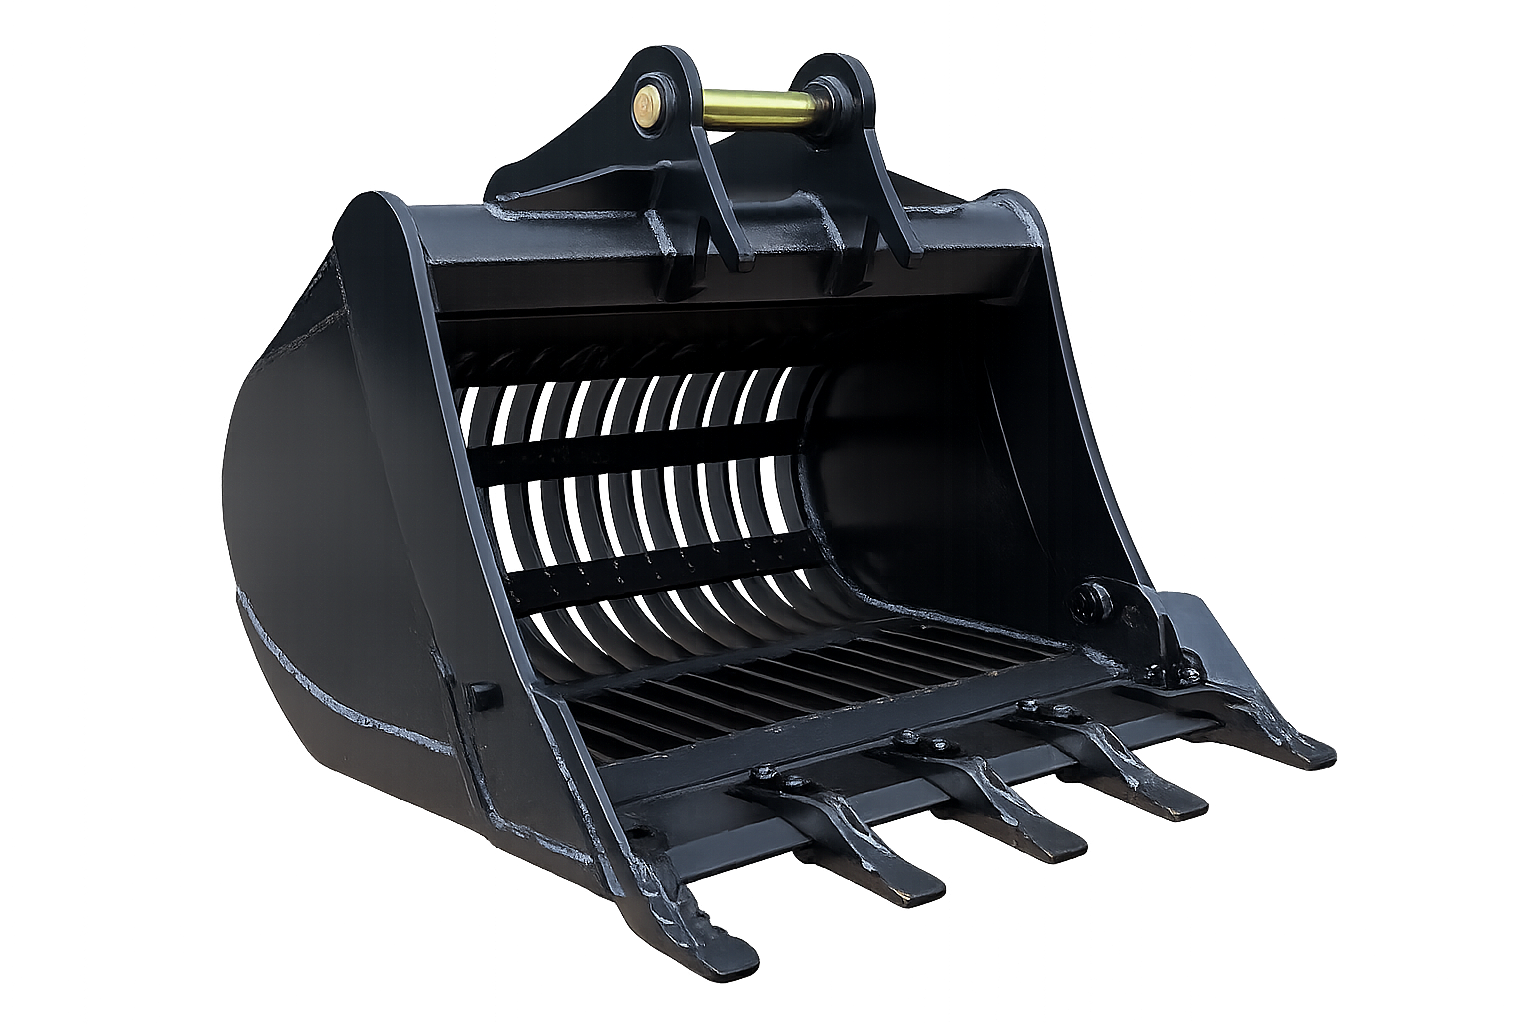
A screening bucket replaces the digging bucket on your excavator or skid steer. Most screening buckets use a quick coupler or pin-on mount system. Match the bucket to your machine's coupler type and weight class. A bucket that is too large for the carrier will be sluggish and put excessive strain on the hydraulics. A bucket that is too small leaves capacity on the table.
Before you commit to a screening bucket, verify that the mounting dimensions match your machine. If you are using a hydraulic quick coupler, check that the coupler's weight rating can handle the screening bucket when loaded with material. A loaded screening bucket weighs significantly more than an empty digging bucket.
Hydraulic Connections
Screening buckets run on the excavator's auxiliary hydraulic circuit. The bucket needs a specific range of hydraulic flow (measured in gallons per minute) and pressure (measured in PSI) to operate properly. Check the bucket manufacturer's specifications against your machine's hydraulic output.
If the flow is too low, the screening mechanism will turn slowly and throughput drops. If the flow is too high, you risk damaging the bucket's hydraulic motor. Some machines need a flow control valve installed to regulate the auxiliary circuit. This is a simple addition, but it needs to be done before you start screening.
Connect the hydraulic lines, bleed any air from the system, and test the bucket empty before loading material. Make sure the drum or screen mechanism rotates smoothly at the correct speed. If the rotation is jerky or inconsistent, check the hydraulic connections and flow settings before you start working.
Screen Size Selection by End Product
Most screening buckets come with a standard screen size installed, and many allow you to swap screen panels for different applications. The screen size you choose determines what product you produce. We cover specific mesh sizes in detail below, but the basic principle is simple: finer screens produce a cleaner product and slower throughput. Coarser screens let more material through faster, but the finished product contains larger particles.
For topsoil screening, the most common mesh sizes are 3/4 inch for landscaping-grade material and 1 inch for general fill. If you need finer product, some screening bucket models accept 1/2 inch panels, though throughput at that mesh size drops significantly.
Choose your screen size based on what you plan to do with the finished product, not based on what produces the most volume per hour. Screening topsoil too coarsely for the intended use means re-screening or delivering a product your customer does not want.
Technique Tips for Higher Production
A screening bucket attachment is a simple tool, but technique matters. The difference between an operator who produces 15 cubic yards per hour and one who produces 30 cubic yards per hour comes down to a few habits.
Feed Rate: Do Not Overload the Bucket
The most common mistake with a screening bucket is overloading it. Operators scoop a full bucket of raw topsoil and then wonder why material is not screening properly. When the bucket is packed full, the screening mechanism cannot tumble or vibrate the material effectively. The soil sits in a dense mass and only the material directly touching the screen surface passes through.
Fill the bucket to about two-thirds capacity. This gives the material room to move, tumble, and contact the screen openings. You will actually process more material per hour at two-thirds capacity than at full capacity because the screening action works the way it is designed to.
Some operators find a rhythm of scoop, hold, dump oversize, repeat. The hold time is where the screening happens. Keep the bucket at a slight angle during the screening cycle so gravity helps move material across the screen surface. Most screening bucket manufacturers recommend specific bucket angles in their operator manual. Follow those recommendations.
Moisture Management: Screen When Dry If Possible
Moisture is the enemy of screening bucket production. Wet, sticky topsoil clogs the screen openings and can cut your throughput in half or worse. Clay-heavy soil that has absorbed rain is the worst case. The material sticks together in clumps, coats the screen mesh, and refuses to pass through.
If you have the option, screen when the material is dry. After a few days of dry weather, the top layer of a stockpile will be significantly drier than the core. Work from the dry outer material first. If you must screen wet material, expect to stop periodically and clean the screen mesh. Some operators use a pressure washer to clear clogged screens at the end of a shift.
This is one area where a screening bucket has a clear disadvantage compared to a trommel screen. The tumbling action inside a trommel drum handles wet, sticky material far better than the screening mechanism in most buckets. If your material is consistently wet and you are screening every day, that is a strong signal to consider upgrading to a standalone screener. More on that below.
Stockpile Management: Separate Your Grades
If you are screening topsoil for different uses, keep your grades separated from the start. Do not dump 3/4 inch screened topsoil and 1 inch screened topsoil into the same pile. Once grades are mixed, you cannot un-mix them without re-screening.
Set up your work area with clear stockpile locations. Screened fines go in one pile. Oversize material goes in another. If you are producing two grades by changing screen panels during the day, put each grade in a marked location.
Label your piles or keep a simple log of what you screened and when. When a customer asks for a specific grade, you want to know which pile to load from without guessing.
Keep stockpiles on a clean, hard surface if possible. Screened topsoil piled on bare ground picks up rocks and debris from the base, which contaminates your finished product from the bottom up. A gravel pad, concrete slab, or even a layer of geotextile fabric under the pile keeps the product clean.
Screen Size Guide for Topsoil
The mesh size on your screening bucket determines the end product. Here is what each common size produces and what it is best suited for.
Mesh Size Product Grade Best Applications Throughput Impact 3/4" Landscaping grade Gardens, lawn installation, raised beds, landscape projects Moderate — good balance of quality and speed 1" General fill Grading, base under sod, general fill, site work Higher throughput, rougher product 1.5" Rough grade Construction fill, backfill, rough grading High throughput, minimal debris removal 2" Coarse screening Construction fill, erosion control, preliminary pass Fastest throughput, removes only large rocks and roots 3/4" Mesh: Gardens and Landscaping
A 3/4 inch screen is the standard choice for producing topsoil that landscapers and garden centers want. It removes rocks, root balls, sticks, and large clumps while letting clean soil through. The finished product has a consistent texture that works for garden beds, lawn installation, raised planters, and most residential landscaping.
This is the mesh size to run if you are selling screened topsoil or using it on landscape projects where appearance and root-friendliness matter. Throughput is moderate. In dry conditions with clean material, expect 20 to 30 cubic yards per hour from a properly sized screening bucket. In damp or clay-heavy material, that number drops.
For even finer topsoil, some screening buckets accept 1/2 inch panels. The finer product works for seed beds and premium garden mixes, but throughput drops further and screen blinding increases. Most contractors producing topsoil with a screening bucket find that 3/4 inch is the sweet spot between quality and production.
1" Mesh: General Fill and Grading
A 1 inch screen is a faster pass that removes the worst debris — large rocks, root balls, and chunks — but lets through smaller stones and coarser particles. The finished product is rougher than landscaping-grade topsoil. It works well for grading, as base material under sod, for filling low spots, and for general site work where the soil will be covered or buried.
Throughput at 1 inch is noticeably higher than at 3/4 inch. You move through material faster because more of it passes through the screen and less oversize accumulates in the bucket. For jobs where the topsoil does not need to be fine, a 1 inch screen gets the work done more quickly.
Some operators make a first pass at 1 inch to remove the large debris and then re-screen a portion of the stockpile at 3/4 inch for a premium product. This two-pass approach lets you process the bulk quickly and only slow down for the material you need to be clean.
1.5" to 2" Mesh: Rough Grade and Construction Fill
Screens in the 1.5 to 2 inch range are coarse passes that pull out only the largest rocks, stumps, and debris. The finished product is rough. It is not suitable for gardens or landscaping. It is construction-grade material for fill, backfill, rough grading, and erosion control features like berms and swales.
Throughput at these mesh sizes is the highest you will see from a screening bucket. Material passes through quickly and the bucket clears fast. This is the setting to run when you have a large volume of mixed dirt and you need to clean it up just enough to use as fill.
If you are clearing a site and the soil has rocks, concrete chunks, roots, and general debris mixed in, a 2 inch screen separates the usable dirt from the junk. The screened material is not pretty, but it fills holes, builds up grade, and keeps you from hauling away soil that has value.
Throughput Expectations
One of the most common questions about screening buckets is how many cubic yards per hour they produce. The honest answer depends on several factors, and the range is wider than most people expect.
Good Conditions: 15 to 30 Cubic Yards Per Hour
In good conditions, a properly sized screening bucket on a mid-class excavator produces 15 to 30 cubic yards of screened topsoil per hour. "Good conditions" means:
- Dry, loose material with moderate debris content
- Screen mesh at 3/4 inch or coarser
- Operator using proper feed rate (not overloading the bucket)
- Material staged close to the work area so cycle times are short
At 25 cubic yards per hour, an 8-hour day produces around 200 cubic yards. That is enough for a small landscaping operation or a contractor who screens material on a project-by-project basis.
Wet or Difficult Material: Drops Significantly
When the material is wet, clay-heavy, or loaded with organic debris, expect throughput to drop by 30 to 50 percent or more. Wet topsoil sticks to the screen mesh, clogs the openings, and forces the operator to stop and clean the bucket. Instead of 25 cubic yards per hour, you may see 10 to 15 cubic yards per hour. On extremely sticky material, production can drop below 10 cubic yards per hour.
This is the biggest production variable with a screening bucket. A contractor who screens dry stockpiles on sunny days will have a very different experience than one who screens freshly excavated clay after a rain. If most of your material is wet, factor that into your throughput expectations and your equipment decisions.
Factors That Affect Production
Factor Effect on Throughput Moisture content Wet material can cut throughput by 30-50% or more Screen mesh size Finer mesh = slower throughput Material type Sandy soil screens fast; clay screens slow Debris content Heavy rocks and roots slow cycle times Operator technique Overloading reduces effective screening Machine size Larger excavators cycle faster and carry bigger buckets
When to Upgrade to a Trommel Screen
A screening bucket is a great starting point, but it has a production ceiling. Knowing when you have hit that ceiling saves you from burning time and money trying to squeeze more volume out of an attachment that was not built for production work.
The Volume Breakeven: 40 to 60 Cubic Yards Per Day
The crossover point where a standalone trommel screen starts making more financial sense than a screening bucket is somewhere around 40 to 60 cubic yards per day. Below that volume, a screening bucket handles the work without tying up too much of the operator's time. Above that volume, the screening bucket becomes a bottleneck.
At 60 cubic yards per day with a screening bucket producing 20 cubic yards per hour, the operator spends three hours screening. That is three hours the excavator is not digging, loading, or doing other productive work. A small portable trommel can process the same 60 cubic yards in one to two hours, and it does not tie up the excavator.
Signs You Have Outgrown the Bucket
- You are screening every day or most days of the week
- Your operator is spending more than two to three hours per day running the screening bucket
- Customers are asking for more screened material than you can produce
- You are turning down topsoil jobs because you cannot process the volume
- Wet material is killing your production and you cannot wait for dry weather
- You want to produce a finer, more consistent product than the bucket delivers
What a Trommel Gives You That a Bucket Does Not
A trommel screen is a purpose-built screening machine. It handles wet material far better because the rotating drum breaks up clumps and keeps sticky soil moving. It produces a more consistent finished product because the screening action is continuous and controlled. And it processes material at 30 to 200+ cubic yards per hour, depending on the machine size — a step change from what any screening bucket can deliver.
We carry new and used trommel screens for operations that have outgrown their screening bucket. Small portable trommels on tracks start in the $50,000 to $80,000 range used and fit on a single trailer. For many contractors, that is the natural next step after a screening bucket.
Shaker screens are another option for dry material. They are fast on sandy, free-flowing soil and offer multiple deck configurations for producing more than one product grade in a single pass. If your material is consistently dry, a shaker screen is worth evaluating alongside a trommel. Read our full comparison: which is better for topsoil, a shaker or trommel screen?
For a deeper overview of all screening equipment types, read our guide to choosing the right screening equipment. For operations considering the step up to an entry-level standalone machine, our entry-level screening equipment guide breaks down the most affordable options.
Getting the Most Value from a Screening Bucket
A screening bucket attachment is a practical, affordable tool when you use it within its capabilities. Here are a few additional tips to maximize its value.
Maintain the screen mesh. Inspect the screen panels regularly for holes, worn spots, and deformed openings. A torn screen lets oversize material through and degrades your finished product. Most screening buckets use replaceable screen panels. Keep a spare set on hand so a damaged panel does not shut you down.
Grease the bearings. Screening buckets have rotating components that need regular lubrication. Follow the manufacturer's greasing schedule. Skipping grease intervals is the fastest way to kill a screening bucket.
Match the bucket to the excavator. Running a screening bucket on an undersized excavator is a common mistake. The machine struggles, cycle times increase, and hydraulic components wear faster. The bucket should be sized to the excavator's hydraulic capacity and weight class.
Know when to stop screening and start hauling. If you have been cleaning the mesh every 15 minutes because the material is too wet, it is costing you more in downtime than you are saving by screening. Sometimes the right call is to haul the material and screen it later when it dries out.
Frequently Asked Questions
What is the best screen size for topsoil in a screening bucket?
For general landscaping topsoil, 3/4 inch mesh is the most common choice. It produces a clean product suitable for gardens, lawns, and landscape beds while maintaining reasonable throughput. For rougher applications like grading and fill, 1 inch mesh works well and screens faster. If you need a finer product for seed beds or premium garden mixes, some screening buckets accept 1/2 inch panels, though throughput drops and screen clogging increases.
How much topsoil can a screening bucket process per day?
In good conditions with dry material, a screening bucket produces 15 to 30 cubic yards per hour. Over a full working day, that translates to roughly 120 to 200 cubic yards, assuming the operator is dedicated to screening. In reality, most contractors do not screen for eight straight hours. A more typical day involves two to four hours of screening mixed with other excavator work, which yields 30 to 120 cubic yards of screened topsoil.
Can I use a screening bucket on a skid steer?
Yes. Several manufacturers make screening bucket attachments sized for skid steers and compact track loaders. Skid steer screening buckets are smaller than excavator models, so throughput is lower. They work well for small landscaping operations and contractors who do not own an excavator. Expect 10 to 20 cubic yards per hour from a skid steer screening bucket in good conditions.
Does a screening bucket work on wet topsoil?
It works, but poorly. Wet, sticky topsoil clogs the screen mesh, reduces throughput by 30 to 50 percent or more, and requires frequent stops to clean the screen. Clay-heavy soil is especially problematic. If your material is consistently wet, you will get much better results from a trommel screen, which uses a rotating drum that keeps wet material moving instead of letting it pack against a flat screen surface.
How much does a topsoil screening bucket cost?
Screening bucket attachments for excavators typically cost $8,000 to $30,000 depending on the size, brand, and excavator class. Smaller buckets for mini excavators and skid steers start at the low end. Larger buckets for 15 to 20 ton excavators run toward the top of that range. Used screening buckets sell for 40 to 60 percent less than new. Compared to a standalone trommel screen, a screening bucket has a much lower entry cost, which is why it appeals to contractors who want to start screening without a major capital investment.
When should I upgrade from a screening bucket to a trommel?
The breakeven point is around 40 to 60 cubic yards per day. Below that volume, a screening bucket handles the work without justifying a larger investment. Above that volume, a standalone trommel screen or shaker screen will process material faster, produce a more consistent product, and free up your excavator for other work. If you are screening daily and your customers are asking for more volume than you can deliver, it is time to look at a dedicated machine.
Talk to Us About Screening Equipment
Whether you are getting your first screening bucket dialed in or you are ready to step up to a trommel screen or shaker screen, we can help you figure out the right equipment for your volume and budget. We have been doing this since 1973, and we will give you a straight answer.
We carry new and used screening equipment at every price point. We also help with financing, coordinate inspections on used machines, and arrange transportation.
Call 770-433-2670 or email Sales@grindercrusherscreen.com to talk with our team.